Showing posts with label Makeup. Show all posts

A wonderful surprise

.
48 comments

Today something lovely happened. I thought it was so nice I wonder what I have done to deserve it. Today I received a package in the mail sent to me by my mother. And I couldn't believe what was inside.


3 x Dior Addict Lipsticks in 561 Baby Rose, 753 Fashion, and 864 Couture
1 x Laura Mercier Matte Eyeshadow Colour in Coffee Ground
1 x Laura Mercier Eye Basics in Wheat
2 x Laura Mercier Satinee Creme Eye Colour in Cocoa Velour and Rum Satin
1 x Laura Mercier Brow Definer in Warm

The thing about my family is that I almost never see them. My mother lives in Cyprus, my sister in Denmark, and my father moves back and forth between Sweden and Indonesia. I miss them a lot and seeing this kind of thing from my family made me really happy. I've never had anything from Laura Mercier but I know it's a very nice and expensive brand and obviously so is Dior. And the other thing that I think is so sweet is that all the colours are exactly what I use and my momma knows that so she chose them thoughtfully. I don't mean to brag and say oooooh look at all these expensive things I have, I would never spend this much money on my self but it kinda made my heart warm very much because I love makeup and I couldn't have picked a better selection for myself so I appreciate it more in a personal way than a materialistic way. So thank you family, it means the world.

Work Face

.
6 comments

I finally have a solid and speedy work makeup routine! I've been experimenting quite a lot because I like to wear a light smokey eye to work, and I want my makeup to be quick and easy to apply as well as long lasting. I also don't want to have to fumble around too much with too many different makeup items/brushes, and just keep to the main essentials. So here is the kit:


Step 1: Apply Milk of Magnesia
Milk of Magnesia?!! Damn straight. I've been using this as my primer for about a month now and I can't believe how effective it is. My skin gets oily throughout the day and my makeup just ends up melting off, but the MoM keeps me matte throughout the day and my makeup lasts so much longer. I have no need to touch up at all. I apply it to my T-zone, cheeks and chin before I put on my makeup and I'm such a fan now. It may sound strange but I love it. And it has no adverse effects on my skin whatsoever, if anything, my skin has never been better. It was actually my mom who told me about MoM (ha!). She told me it's great to use as a deoderant. At first I thought damn you crazy! But then I tried it and it just kept my armpits dry. Since MoM doesn't have a smell I will use a fragranced deoderant too but by using the MoM first it's like your pits are a guaranteed sweat-free zone. Good stuff.

Step 2: Foundation
I'll apply my foundation with my fingers, I'll only take about a minute blending it around as I don't use much foundation anymore and only apply a thin layer all over.

Step 3: Concealer
I'll apply my garnier eye roll-on onto my clean ring finger and pat all around my eyes. I also use this as a concealer on pimples or uneven skin on my face to reduce the amount of items in my makeup bag + to save time.

Step 4: Eyebrows
I like to use Rimmel eye brow pencils because they are not too soft and not too stiff. I fill my eye brows in with fast stroke movements (like I'm drawing hairs) and if needed I'll soften with a brush.

Step 5: Bronzer
I just use a blusher brush to apply bronzer onto my cheek bones, temples and top of my forehead for some glow.

Step 6: Eye Primer
I use Gosh's stick eye shadow primer all around my eye and also on my waterline.

Step 7: Eyeliner
I recently bought Maybellines black gel liner and it definitely does NOT last 24 hours on my eyes but it's probably the most effective thing I own right now in terms of staying power. I apply this on my lower and upper water line and also around the eyes closely following the lash line and finish with a little outward flick. I do this rather quickly and don't care about mess as I blend it next.

Step 8: Eyeshadow
To save space and time I use my bronzer as eyeshadow all over my lid and under my lower lashline. I don't have to be too careful with this as the shade isn't too far off from my skin colour so its very easy to blend. Then I'll use my dark brown Max factor dip in eyeshadow as it's very fast too apply, I'll put this all around my eye close to my upper and lower lash line. Then I'll take my eye shadow brush and blend all this together so it kind of becomes a smokey gradient from the eyeliner to the dark brown eyeshadow to the goldy bronze. Right after I've blended my eyeshadow I'll run the brush down the sides of my nose for some speedy contouring and the excess shadow on the brush is always enough.

Step 9: Mascara
I start with a couple of coats of my favourite Diorshow primer then I'll use any black lasting/water proof mascara (currently using 17 Photo Flawless in Copper Black). Depending on how much time I have sometimes I'll just do one coat of each.

Step 10: Blush
I bought a pink cream blush specifically for work since I can just apply it with my fingers so it's a lot quicker.

Step 11: Lips
I'll usually apply a little bit of lipstain on when I'm on the bus but sometimes I'll skip this and leave my lips natural.

  
That is the finished look. This will usually take me around 15-20 minutes and that's while watching tv, having my morning coffee and doing my makeup in a compact mirror. I'm forced to do my makeup like this because I live with students so I have to go downstairs to the living room to get ready to avoid waking people up. It makes life so much slower! If I had a proper mirror and space to do my makeup this would probably take 10 minutes. And once it's done I don't do any touch ups except for maybe my cheeks or eyeliner on my waterline. Do you have a work/school makeup routine, and how long does it take you?

Thanks for reading ;)

Update + Look using giveaway items

.
17 comments

Thank you so much to everyone who has joined my giveaway and a welcome to the new faces! I've been reading everyone's nice comments although I haven't had time to respond because of work, but tonight I'm finding some time to let everyone know my appreciation. Also I've been trying to think of some makeup looks suitable for the work place! And I thought what better than to try a look using some of my fave products that I included in the giveaway :D. This look was inspired by this gorgeous lady:


That is some serious O-M-G beauty. I know she doesn't always look like that but she's just got such a gorgeous look in this photo! I wasn't trying to make myself look like her at all with my makeup but I wanted to copy the style i.e. a dark eye and nude lip.


For this look I used the 3 neutral MUA shades in the giveaway (shade 1, 17, and 19) and the wet and wild mono in cherub. I love the 3 MUA shades and use them quite a lot for a brown smokey look or understated eye makeup like my above attempt. The dark brown MUA eyeshadow is also awesome for eyebrows since it's quite an ashy dark brown and no shimmer! To be honest I don't use the pearly off white shade as eyeshadow at all but as a highlighter for my t zone and above my cheeks.

I used the Pink Mallow lipstick mixed with a teeny bit of concealer on my lips. If you knew me you would know that this is my HG pink lipstick. I've been using it for years and I LOVE it. Seriously can't get enough of this stuff. Natural Collection do quite a wide range of beautiful lipstick shades and I want all of them! Anyway it's bedtime for me, but more on the weekend and I hope you enjoyed this look!

Pictures Pictures Pictures

.
2 comments

As I've now got a job I've been dreaming about things that I can buy with my hard earned money :). I've been doing lots of online window shopping for inspiration. I especially love looking on lookbook and asian wholesale sites. While I've never purchased any clothes from an asian wholesaler, I absolutely adore browsing through the clothes and I find the clothes look amazing on the models. Also makes me want to lose some weight! These are pictures of things I like, want, and as inspiration for myself.

Book Clutch 

Wing Wedges
2-Tone Lips

2 Piece Dresses


Bold Color


FOTD 9/2/2012

.
8 comments


 Praise the lawd for beauty shot. Seriously, I've been thinking that my photos have been turning out better than usual recently and it's because of this badass setting on my camera. I'm just using a standard 10.2 megapixel digital camera, the Samsung PL50, but the beauty shot mode smooths fine lines and blemishes and brightens your complexion. Who needs fancy lighting or Photoshop?!
Anyway, this is today's makeup look. After reading Sally's post relating to ulzzang, I kinda wanted to try the ulzzang look just for fun, but I don't have any circle lenses, so I decided to just do a similar doll-inspired makeup style instead. 


Quick Summary:
  • Foundation
  • Pale concealer to highlight Tzone and under eyes
  • Bronzer to contour sides of nose, temples and forehead
  • Fill in eyebrows
  • Pink blusher on cheeks
  • Little bit of foundation mixed with little bit of light pink lipstick on the lips
  • Thin kohl eyeliner applied around upper and lower lashlines with small outward horizontal flick
  • Line upper and lower waterline
  • Apply brown eyeshadow around eye just on top of kohl and blend with liner.
  • Butt load of lash primer and mascara to upper and lower lashes 
Done!

Diorshow Maximizer

.
5 comments


I wanted to show the effects of the Diorshow Maximizer plumping serum on my eyelashes because I'm so impressed with it. This was another Christmas present I received, and I use this every day prior to applying mascara. In the photos above and below I am wearing the serum and some mascara applied on the left eye. 


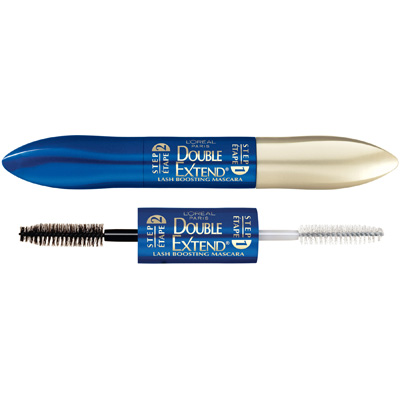
As you can see there's a huge difference. I know that a lot of makeup brands produce these lash primers such as the L'Oreal double extend lash boosting mascara which I have used a few years back, but I don't remember seeing such a visible increase in the length of my lashes. At £22.00, the Diorshow Maximizer isn't the cheapest primer available but I think it's worth the money. My dentist actually asked me where I got my eyelash extensions done while I was getting a filling! For a slightly cheaper price, at £20.00 the Lancome version, Cils Booster XL, works just as well which I was using prior to the Dior one. I would have continued with Cils Booster but my sister got me the Dior version for Christmas instead so it's great news that it's equally as effective.


FOTN 1/2/2012

.
11 comments

For Christmas I got a Dior eyeshadow palette in 708 amber design and I haven't used it once so I thought i'd test it out and do a makeup look together with my new Natural Collection Moisture Rich lipstick in Cranberry.


I wanted to make my eyes look more Asian and more almond shaped. I don't know if it really worked, it just looks like a regular smokey eye :/. ANYWAY, I wasn't actually going anywhere looking like this, I was just home alone, a bit bored, and felt like experimenting with my new makeups. I don't know if I'd wear it out, because the lip color is quite dark I'd wear it with lighter eye makeup. Also I'm wearing my airfoam foundation in these pictures and I didn't even apply concealer anywhere so the coverage definitely isn't light.

Maybe she's born with it, maybe it's Airfoam.

.
1 comments

It's the new Maybelline Dream Nude Airfoam! I bought this yesterday in Sun Beige and here's what I think. (I'll add some of my own photos when I get round to taking them).

Initial Impression: Annoying but Intriguing.

I'm a complete sucker for gimmicks and novelty. But I don't really like Maybelline, in fact I don't think I have anything else in my makeup collection that is from Maybelline. When Dream Matte Mousse initially came out years back I was like "OMG Mousse?! WOW!" just because of the novelty factor. But when I tried it I couldn't stand it, it's sooo cakey and sets into lines, just BLEURGH. Waste of money quite frankly and I didn't want to be disappointed again.

But with this, the whole air/foam/canister/mousse thing was just too intriguing once again, and this is what really made me buy it.

Shades: There's 8. That's hardly enough but I guess that's standard for high street brands. I spent like 30 minutes trying to choose between Sun Beige and Sand. Sun Beige just looked a bit too dark and the latter too light. I ended up buying Sun Beige and when I got home and tried it on my face turns out it isn't too bad, it is a bit dark but I'm wearing a lot more turtle necks now it's winter so who can tell, and in the summer I'll be more tanned.

Dispenser: Another annoyance, I don't care about the fact you have to shake it cus I usually do that with my liquid foundations anyway, it's the fact that it's really hard to control the amount you get. I'm getting a bit more used to it now though, but I hate wasting product.

Coverage: I read some other reviews saying the coverage was too little or light but I have to disagree, I'd say it has medium coverage and definitely more than a tinted moisturizer (which is what I'd consider as light). And it looks and feels really natural which is a big bonus. Some of you may be familiar with Lisa Aldridge, and I totally agree with her motto of only covering what you need to. So this is great applied lightly all over the face to even out the skin tone, then use a concealer on your problem areas, you shouldn't cover up the good parts of your skin! Again I have to stress that it feels super light and it also sets really well on the face HOWEVER if it's rainy or you cry a lot, then you need to invest in a good finishing powder like Vichy Dermablend Setting Powder to repel the water. The reason for this is because it goes really milky when it comes in contact with liquid, more so than with other foundations in my experience.

Application: Yes it does dry quickly so it needs to be applied quite quickly to avoid streaks. But I don't mess around I like to get my makeup done quick so I'm pretty fast anyway. And application for me is very simple:


Ever seen a man apply aftershave? That's basically what I do, apply it on my fingers, rub my hands together and apply it in circular patting motions all over my face. It also helps to keep a wet sponge incase there are any streaks or if you want to blend away at your neck or hairline.

Lasting power: I'm still quite undecided about this. I don't think makeup ever stays perfect all day but when I look in a mirror halfway through the day I notice the problem areas which are dependent on the lasting power of my concealer and not so much the foundation. I do notice that my skin tone doesn't look as even after a while but yesterday I slacked with primer and setting powder which makes a huge difference. I'd say the lasting power isn't too bad, no better than other foundations but no worse either.

Price: RRP £8.99 from Superdrug but currently on sale for £6.99
I have no problem with this price whatsoever, it's quite a standard price for a high street brand and none of the other foundations I use are this cheap. The only other highstreet foundations that I've used and liked are Revlon PhotoReady Foundation which retails at £12.99 and 17 Photo Flawless Foundation which was £6.49.


Overall: For the moment I must say I like it!